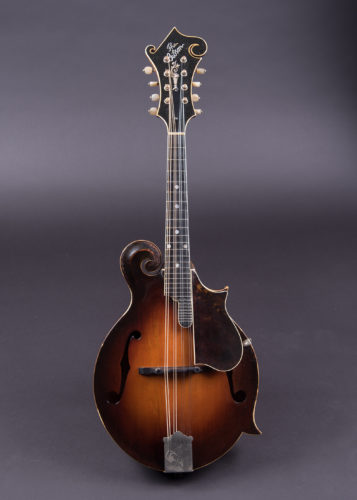
To mandolin aficionados, the sight of the earliest known Gibson F-5 mandolin should have been a gratifying – if not inspiring – experience. After all, it is the first example of a mandolin design that, in the hands of such players as Bill Monroe, Dave Apollon, David Grisman, Sam Bush and Chris Thile (the list is endless), would become acclaimed as the pinnacle of American mandolin design. Instead, this earliest F-5 was a horrifying sight – the most important mandolin in American history, disfigured with ugly top cracks, amateurishly patched together with wood putty.
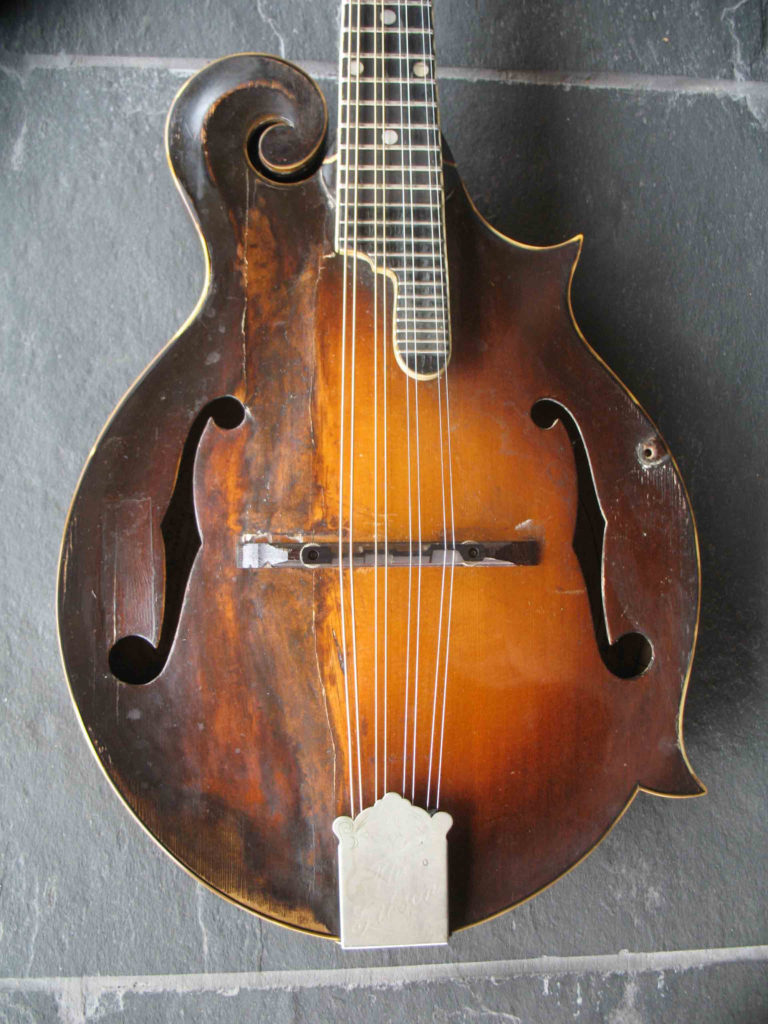
That has been the image of F-5 #70281 that the mandolin world has had to live with since 1977, when Darryl Wolfe documented it in his F-5 Journal. As Wolfe noted, it was signed by its designer, acoustic engineer Lloyd Loar, on June 1, 1922, preceding all other known Loar F-5s by five months. In 2015, however, a new owner acquired 70281 and brought it to Stephen Gilchrist, the renowned Australian mandolin maker, with a request to bring it back to life.
Gilchrist took possession of 70281 in November 2015, on his annual trip to Nashville to deliver his latest batch of new instruments to us at Carter Vintage Guitars, his U.S. distributor. Seeing 70281 in person was an emotional experience for him. “I was excited and I must say honored at the fact that it was brought to me for restoration,” Gilchrist said. “I had only seen photos of it that Darryl Wolf took. It was true to the photos.
“It was a very personal thing to me because that is where my whole career – and many of us who build these instruments, love these instruments, play them – that’s where our whole career started from.”
Moreover, the confidence Gilchrist had in his own abilities, the confidence that he would have to bring to repairing the instrument, originated in that same instrument. In that sense, 70281 was bringing him full circle. “That instrument got me to where I was able to fix that instrument,” he explained. “That’s what flashed over me… I got here because of you.”
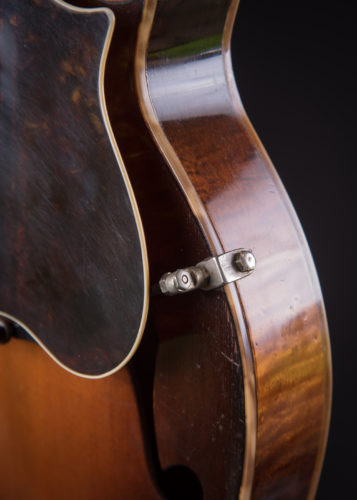
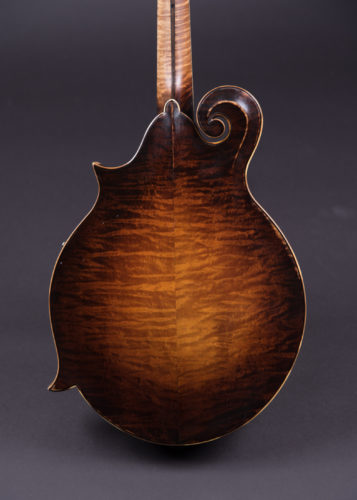
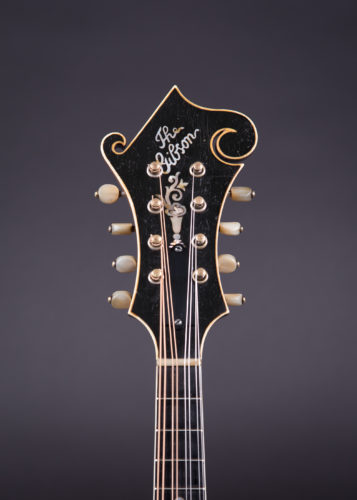
Gilchrist took 70281 home to Lake Gnotuk in southeastern Australia. “I had a year to do the repair,” he said, “and I spent the first three months thinking about it.” During that time, he got to know not only the extent of the damage but also the specifications of the instrument. Its measurements were consistent with later Loar-signed F-5s and with the spec sheet that had survived in Gibson’s engineering archives. The only structural differences were the size of the f-holes, which were slimmer, and the braces, which were tapered in a different way. Cosmetic differences were minor and included an odd, over-engineered pickguard bracket and a volute spline on the heel button.
Structurally, the damage was not as bad as it first appeared. “Looking through the tail pin hole,” Gilchrist said, “you could see it was initially a really clean break. There were some fine splinters hanging down on the inside of the instrument and you could see where the damage lines were. You could see where the bass side was pushed down from the trauma and never leveled off. The wood putty was just there to smooth off the terrace from the earthquake that had happened on top. You could push it and would creak and move and you could see light.
“I was thinking that if only I could realign those areas and push the plate back upwards, it would go back together cleanly. It wasn’t as straightforward as that, because on the top surface there was quite a bit of wood missing. In trying to get the top level again, they put some crude finish on it that damaged the wood underneath.”
Gilchrist came up with a game plan and presented the owner with three options. Here is his original email to the owner:
- Simply re-align and glue all the cracks, fill all the missing pieces (wood fibre and glue) and as best as can be done to match it to the treble side by disguising the damaged area with stain and varnish. This would be the least invasive option but worst visually. Structurally not ideal but stable.
- Splice in a new matching piece of red spruce 1 5/8″ wide the length of the soundboard to replace all the worst damage. A better visual and structural option but more invasive and would mean there would be two extra glue seams in the top (i.e., four-piece top instead of two pieces – a visual consideration) and it still leaves the previously poorly spliced outer wing of the bass F hole to be dealt with once the main damage is replaced.
- Replace the whole bass side of the soundboard back to the center seam (two-piece top, like the original). This would be the most invasive but structurally and visually the best result, not considering the loss of originality of half the top.
In addition, Gilchrist saw that the original set of the neck caused the bridge to be lowered to the point of “bottoming out,” so a neckset would be needed, along with some fret work and other neck repairs, but that was a separate project.
As Gilchrist noted, Option 1 would be the least invasive, and that’s the path they chose for the restoration.
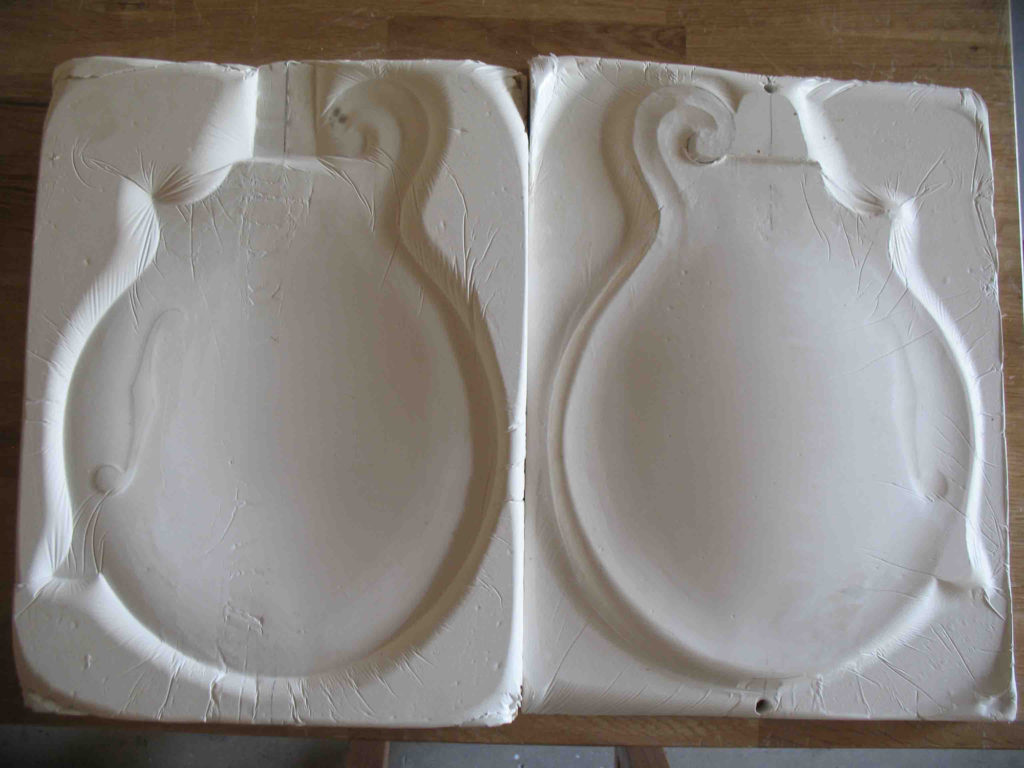
“The first thing I did,” Gilchrist recalled, “I made a mold to encase the instrument just below the lip of the top so the rim would maintain its proper shape. They always spring open. Then I made a plaster cast of the top. Because the deformed part of the top was sinking in, that formed a positive rise in the cast that could be shaved down to the proper profile lines. So then I had the perfect negative outside form to press the top into.”
To facilitate the top removal, he took off the fingerboard and the fingerboard extension support and then used steam and warm spatulas to work the top off the body. “Once the top came off, I picked out all the wood putty,” he said. “It had to come out before the pressing into the mold. Once the wood putty was out, the full extent of the damage was revealed, and it was shocking. The violent trauma was really apparent. You can see all of the cracks and what appears to be a blade mark as well. The first thing that came to my mind was Psycho.
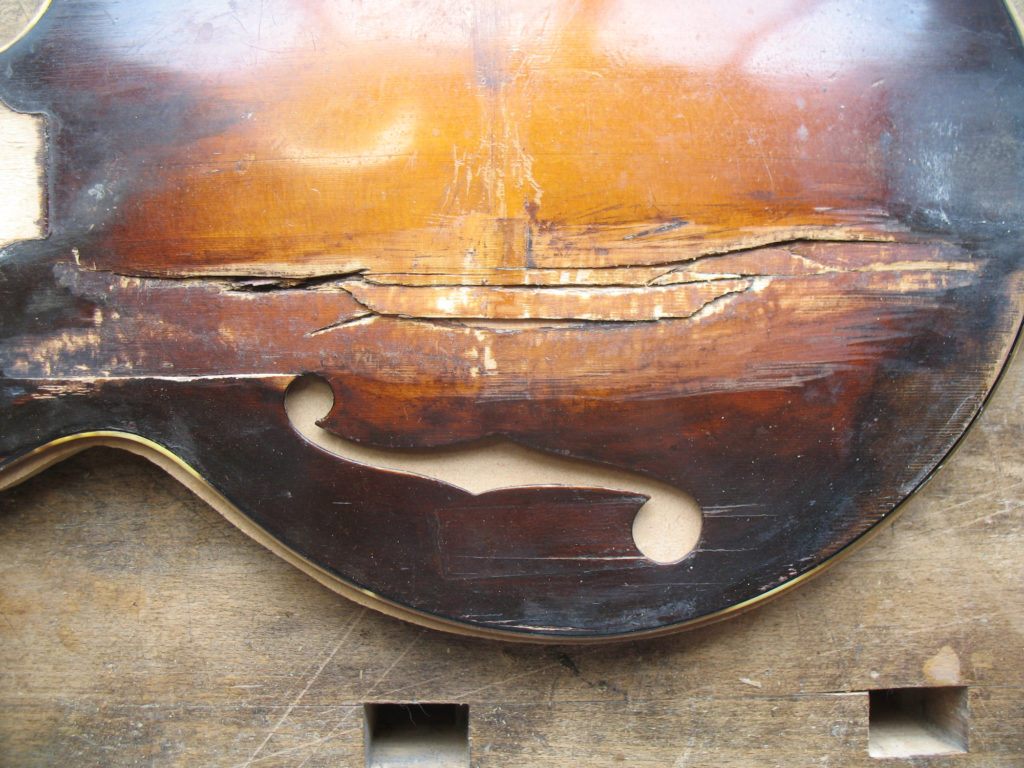
“Once I got the wood putty off I was able to do a dry press initially,” he continued, “just forcing it into the plaster mold, getting every little shard, every little misaligned part pushing hard against the plaster. The whole thing came together quite well, so it just needed to be animal glued up to hold that form. There’s nothing spliced in there at all. The plaster mold was the key to all that, reforming the top and pushing back up into the top as much of the splintering and shards as possible.”
“Before I did that, I thought the bass tone bar would have to be replaced because it was completely cut in half by the blade, or whatever it was. But it wasn’t really severed. It cracked under the deformation. All the fibers were there. Just saturating them with super fine super glue locked everything back into place. That was another plus for it.”
Gilchrist installed a long cleat, 1/16” thick, on the underside of the top to support the repaired cracks. He had had to remove a small amount of wood to fix the cracks, and the mass of the cleat was approximately equal to the amount of wood removed.
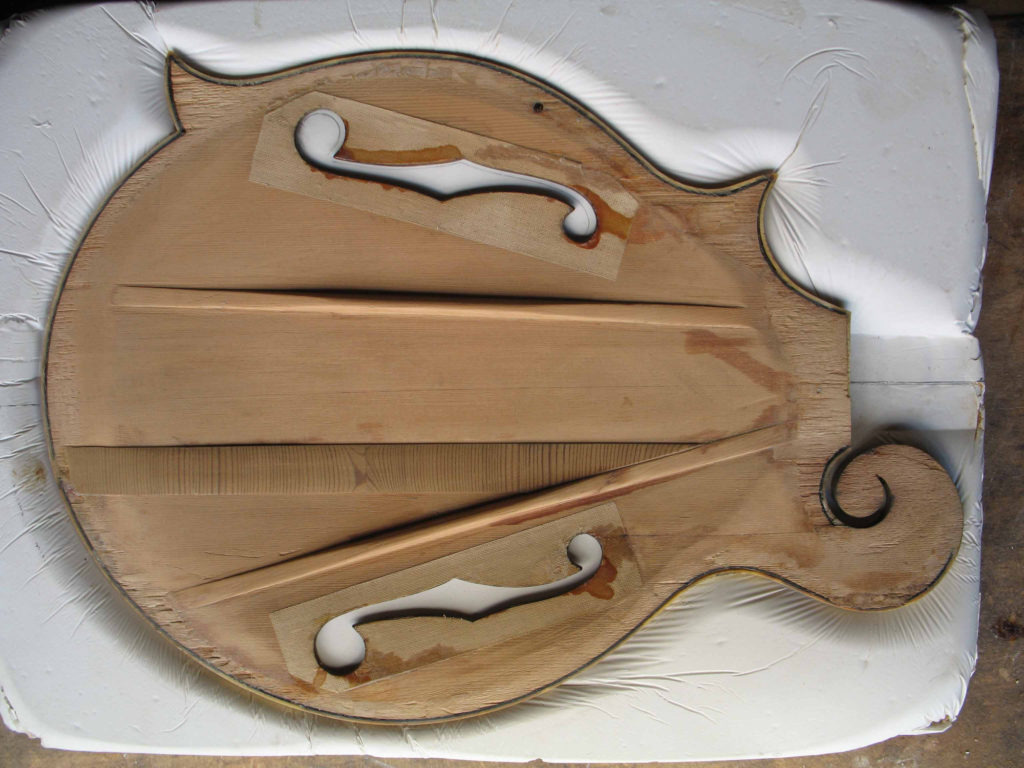
At that point, the question, as with any major repair, was how the repair would affect the sound of the instrument. Gilchrist had the answer before the top was back on 70281. “The cracks were all glued back together against the plaster mold,” he said, “and as soon as I did that, the sound came back. Just by tapping it you could hear that fine ring, that bell. With any crack there’s a certain dullness of energy, even if you can’t hear the rattle. This thing rings again, sustains and gives a real focused tap. Once I heard that, I knew everything was going to be all right. The rest was just going to be cosmetics.”
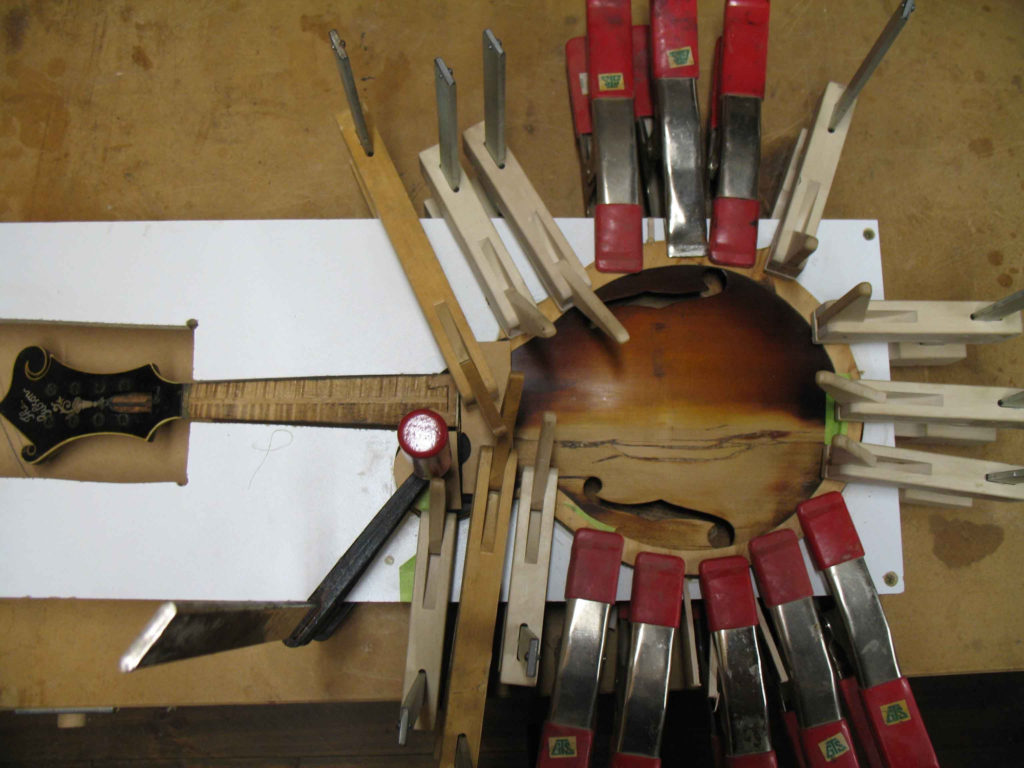
Gilchrist chose to fill the cracks with a mixture of wood dust and glue rather than inserting splices. “To splice tiny bits in you’d have to remove tiny bits of wood,” he explained, “and because of light refraction they would have stood out anyway. You would have had to remove top wood to do that, so I filled it with original wood dust, the nasty scars, that I knew wouldn’t react to light. In one direction the scars are dark, the other light. There’s a neutral position where you can almost fool yourself into thinking it’s not there at all.”
With the cracks filled, Gilchrist began working on the finish – only on the area of the damage. “Everything else, though it was incredibly worn, was left original,” he said. “I had a written law I wrote for myself that I was not to go beyond the center seam when removing the original finish. I had to remove a little bit to get a clear bit of raw spruce to do the water stain. The very first thing, I shot potassium dichromate. It’s a photo-reactive chemical. If you put it on natural cellulose material, such as wood, and expose it to ultraviolet light it will darken. It’s a good way to age the wood. It’s the same process that happens naturally.
“At that point, with the raw wood, you’ve got to allow for the color of the wood and water-staining and the color of the varnish on top. You have to make sure the initial dichromate was not too dark. Fortunately, I had the original treble side right beside it to compare it to. Then I did the water stain sunburst like I normally do, directly into the wood. Once I did that, I was getting pretty confident. I had the background color of the wood right. I really enjoyed the process. It was fun blending that in. Then, like the original finish would have had, I put a really dark shellac sealant coat over it. That gives it that dark amber glow that Loars have.
“The more of the shellac sealer coat I put on, the more the scars started to soften. Any touchup color, I wanted to have that buried down. I was thinking about layers, and when you’re doing touchup you want that as low as possible. I did the touchup on the raw wood, then the potassium and then the water stain, then the dark shellac sealer, and then the clear spirit varnish top coats.”
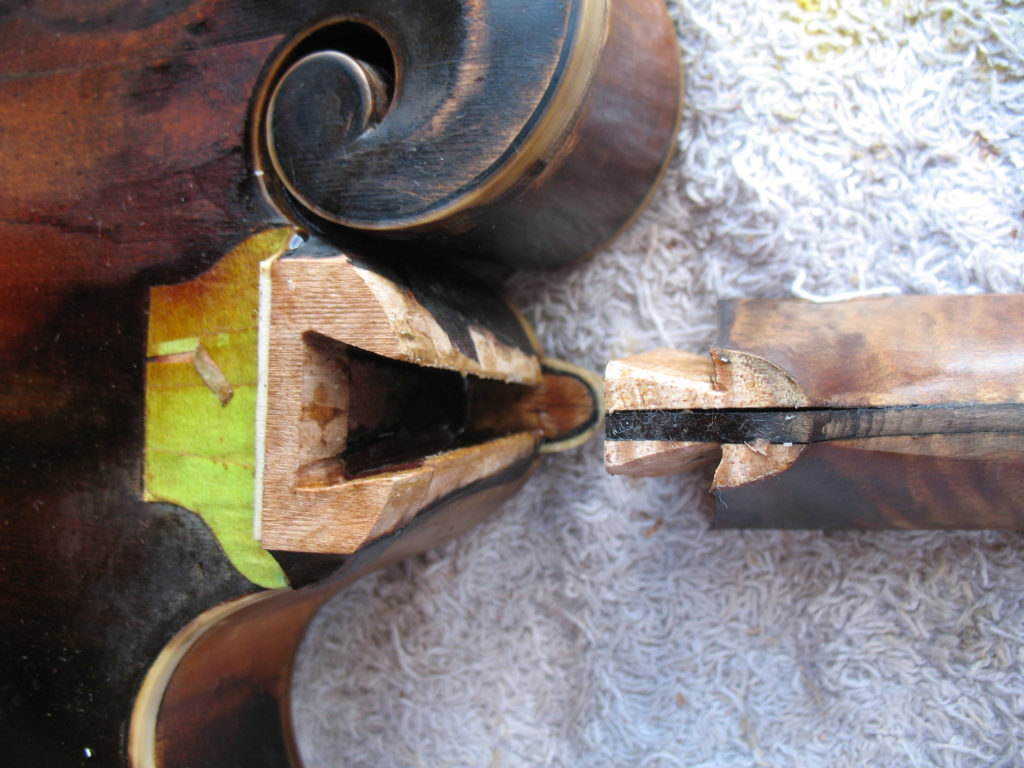
Halfway through the finishing, Gilchrist reinstalled the neck, added a dummy fingerboard, strung up the mandolin and played it. “I did a little sound file on the phone and sent it to the owner,” he recalled, “and he got all excited. It was clear that the sound had come back.”
The fingerboard of 70281 was a separate restoration project. “A lot of the frets were in the wrong position, as on many Loars,” Gilchrist said. “I had to plug and re-tap a number of frets. On the instrument as it was, only the frets from 29 back to 17 were original. There was fret wear and original pick wear in that area, and I left that. The first 17 were wide guitar wire. I replaced them. I also had to replace the binding on the bass side. It was falling off and cracked and broken in a lot of places.”
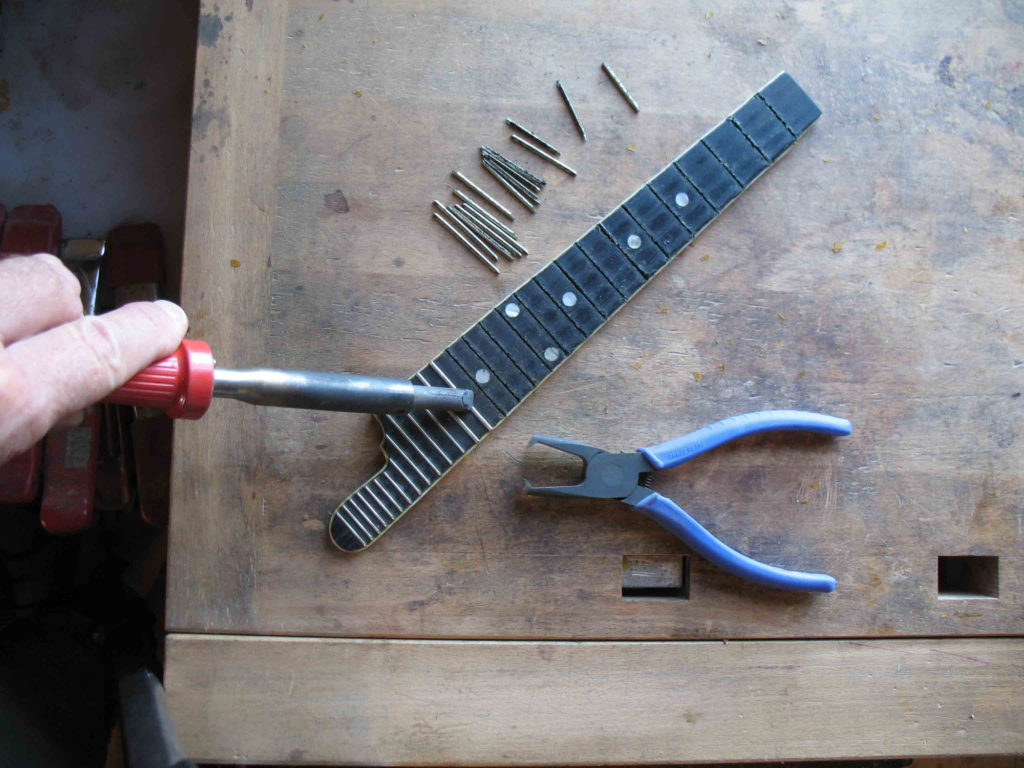
After a few additional repairs – replacing the binding on one body point, closing a center seam separation on the back – Gilchrist reinstalled the fingerboard and strung up the fully restored mandolin. He had spent 100-plus hours, spread over a four-month period, to get to this point. Appropriately, the first thing he played on the fully restored 70281 was a Bill Monroe tune called “The Lloyd Loar.”
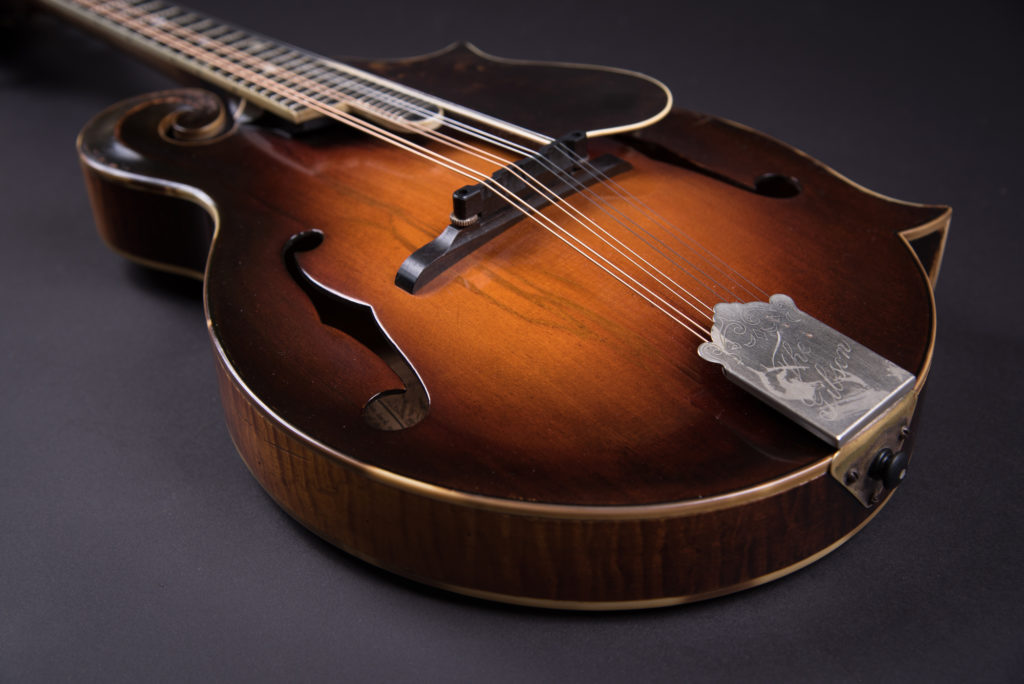
Before the repairs, 70281 had a distinctive sound due to the slimmer f-holes, which affect the fundamental frequency of the air chamber – one of the elements that can be “tuned,” as stated on the label that Lloyd Loar signed. The fundamental frequency of 70281’s air chamber was a half-tone lower than the typical Loar F-5. Most are between D and D#, but 70281 is between C# and D. “Generally, the lower the frequency, the more bottom end is going to be under the foundation of the sound,” Gilchrist explained. “There’s going to be a thicker tone to the bell.”
The mandolin had always had an impressive sound. Darryl Wolfe has recently posted online that it was “the best-sounding Loar I have ever played… more like Monroe’s Loar than Monroe’s Loar, if that makes any sense.” Given the low frequency of the air chamber, it should have had a strong bass sound, but before the repair, mandolinist Chris Thile played it and commented that the bass response was “spongy” – an issue that has now been corrected. As Gilchrist explained, “The treble tone of this mandolin was always amazing, but the clarity of the bottom end was really compromised by the lack of stiffness on that side. It was hard to tell what was happening with the bass response until the top was glued back together. That was the real great sense of achievement, to bring back the sound of the instrument.”
In November 2016, the owner of 70281 held it and played it for the first time in a year. He would prefer that his identity not be publicized, but he plans for the instrument to be played.
